For beginners who want to learn how to whittle, it's possible to start with the basics. You will need a knife and wood. This article will explain the differences between different types of wood and how to use them. Once you understand the basics of whittling, you are ready to begin your own project. There are many types and styles of whittler projects.
Wood
While there are literally thousands of types of wood, you will find the four woods on this list to be the best for whittling. This list of woods will help beginners get started in whittling. There are many ways to whittle the wood to get different shapes. These are just a few of the basic methods you can use to whittle wood.
The pull stroke is when you carve wood. Keep the blade parallel with the grain. This will help avoid damaging the wood. Dark streaks in the wood will indicate the direction of the grain. When whittling, the direction these streaks run will determine the direction of the blade. The pull stroke of the blade is less effective than the push stroke.
Knife
If you're new to woodworking, whittling with a knife can be a good way to try your hand at the craft. Although you may be a novice at this, the right technique can give you great control and allow you to make precise cuts. Practice the pull stroke, for example, by cutting small strips with a knife soap. Practice makes perfect. Beginer projects are easy to manage, but they get more difficult as you advance.
You will need a knife before you start whittling. Because it can be used to make shavings, a pocket knife is the best choice. Avoid knives with long, wide blades as they can cause choking. Choose a knife that has a narrow bevel to make it easier to sharpen. A frame saw can be used if needed.
Techniques
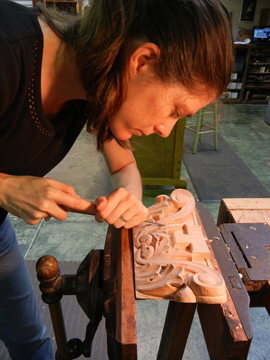
There are a few techniques that you can use to improve your skill at whittling. The most common cut is the pull stroke, which involves bracing your right thumb on the wood and pinching your right fingers. You then draw the blade towards your right thumb and keep the knife straight. This stroke is short and controlled, and it gives you a lot of control over the blade. This technique is best for detailed cuts.
There are two types of whittling publications. The Old Time Whittling is the first, and it is a great reference book for beginners. The Little Book of Whittling also has many great ideas for whittling. The Whittling Handbook has many whittling project ideas. The Art of Whittling has some advanced projects. This book features simple puzzles as a well as patterns like ball, cage, and so on.
Tools
First, you need to choose the best wood for your project. While you can use wood from the street, it is better to have your own greenwood. It is much easier to carve greenwood than dry wood. Deadfall branches can be collected at any time. Even though small trees can still be picked up at any time of the day, it is best to do so in winter. You must ask permission to collect wood if you are working on private property.
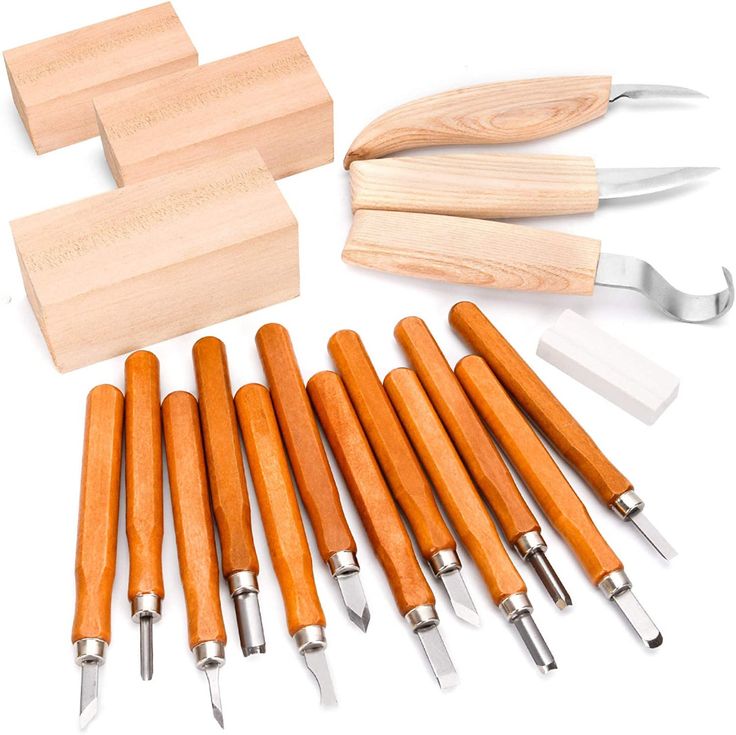
You can find some fantastic sets if you are just starting out. One such set is the Delicacy carving set, which contains 12 tools, a wooden spoon blank, and a knife sharpener. This set also includes protective gloves, a carry bag and a pouch. A set of whittling instruments is worth the investment, as you will be using them for many years. This set can also be used to start.
Projects for beginners
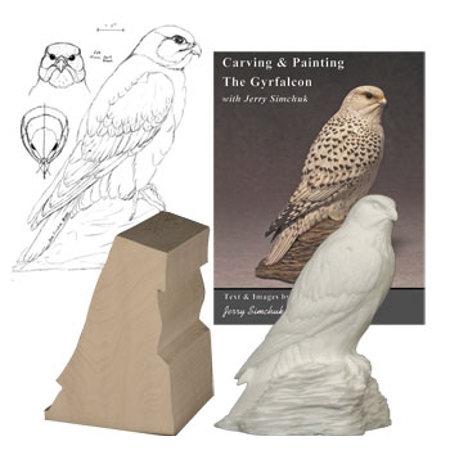
You might start out with a simple project like a walking stick if you're new to wood whitling. You can work your way up to more complex projects, like carving faces on walking sticks. Comfort Birdie is a bird that can provide comfort for beginning whittlers. A swan is another beginner-friendly whittling project. These are great gifts and easy to make for children.
Another project that is considered a beginner project is a carved ball in a cage. It is possible to create intricate designs using feathers and match them with your theme. Tiki idols can also be created. There are so many possibilities. However, it's always a good idea for you to have a template. You'll be able to identify which tools are best and what parts you don't need.
FAQ
What time does it take for furniture to be finished?
It depends on the size and condition of the furniture. Boxes and picture frames are small projects that can be completed in one day. Larger projects, such as desks and dining tables, can take several days. It takes time for the wood to be stained and sealed properly.
Do you have any other information I should know about woodworking and/or the process of making it?
It is easy to underestimate how much work it takes to make furniture. Finding the right kind of wood is the most difficult part. There are so many varieties of wood available that choosing one can be difficult.
Another problem is that not all wood has uniform properties. Some woods will warp over time, others will split or crack. These are important considerations to make before you purchase wood.
What tools are best to begin with when I become a woodworker
Woodworking takes practice and patience. It takes time to learn how to use all the different tools and techniques required for woodworking.
There are many options for woodworking equipment today. Some people prefer to use power tools while others prefer manual tools.
While you have the option to pick what you like, it is essential that you get the right tool for the job. It may be a good idea to start with a basic set, if possible, if you don’t know much about hand tools.
You might also consider learning how to use the router to create intricate shapes from wood. You can find these at most hardware stores.
What material would your recommendation be to learn woodworking?
Start with softwood like pine, poplar and ash. Once you feel comfortable with these two, move on to hardwood.
How can I tell what kind of wood I am working with?
Always verify the label on wood purchases. The label should include information about the wood species and its moisture content as well as whether or not it has been treated using preservatives.
Statistics
- Most woodworkers agree that lumber moisture needs to be under 10% for building furniture. (woodandshop.com)
- Woodworkers on the lower end of that spectrum, the bottom 10% to be exact, make roughly $24,000 a year, while the top 10% makes $108,000. (zippia.com)
- The U.S. Bureau of Labor Statistics (BLS) estimates that the number of jobs for woodworkers will decline by 4% between 2019 and 2029. (indeed.com)
- The best-paid 10 percent make $76,000, while the lowest-paid 10 percent make $34,000. (zippia.com)
External Links
How To
How to stain wood
Staining wood can be described as a process where chemicals are applied to the wood surface. This causes the wood to take on a new color. This chemical reaction changes the wood's color from white to brownish. Although oak is the most popular type of wood to stain, there are many other types that can be used.
There are many options for applying stains to wood surfaces. You can mix the stain with a solvent, such as turpentine, and spray it onto the wood. Some methods involve a mixture of water and dye that is applied directly to the wood. You can mix stains into varnishes or paints to make them part of your finish coat.
Preparing your wood for staining is the first thing to do. The wood must be thoroughly cleaned to remove all grease and dirt. Sanding smoothens any scratches or rough spots. The next step is to choose the stain type you want. There are two main kinds of stains available: non-penetrating stains and penetrating. Penetrating stains penetrate deeper into the wood than non-penetrating ones, making them ideal for dark colors such as mahogany. Light colors such as maple work well with non-penetrating stain.
After deciding on the type of stain, you want to apply, prepare your tools. Because you can spread the stain evenly with a paintbrush, it is ideal for applying them. It is a good idea to have rags on hand in case you need them to clean up any stains that may remain after you have finished painting. You should have enough containers to store the various components of the stain mixture if you intend to mix it yourself.
After you have prepared the materials, you can clean the area where you want to stain the wood. Clean the area with soap and warm water to get rid of dirt and grime. Use a dampened rag and clean water to wipe the furniture. Be sure to get rid of all loose material, especially if staining is planned for darker wood.
Next, spray the stain. Start at one end of the piece of furniture and brush or spray the stain onto the wood. Work slowly and carefully, moving back and forth along the grain of the wood until you reach the opposite end. Make sure that the stain does not drip off the edge of the wood. Allow the stain to dry completely before you move on to the next step.
A coat of clear polyurethane sealing agent is applied to protect the paint. Three coats are recommended for polyurethane. Allow the third coat, which should dry overnight, to dry before sanding.