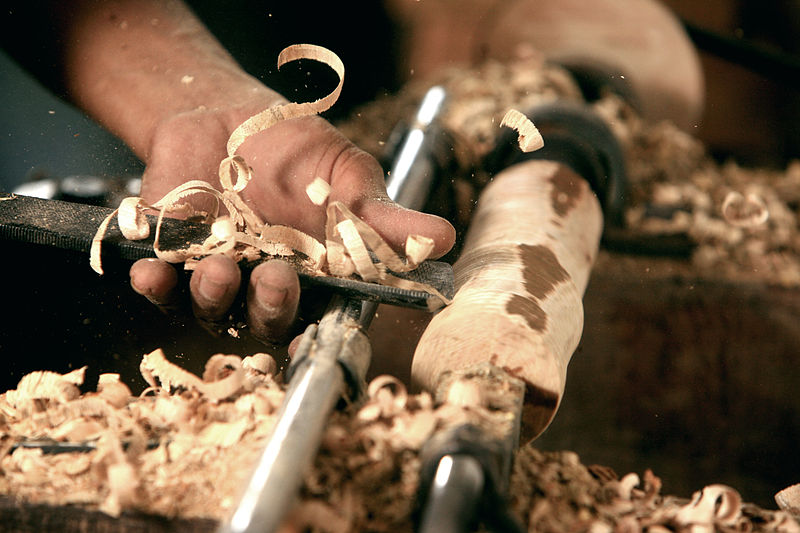
You may have to adjust the angle or top bar of a lathe to accommodate your fingers if it does not have the right tool rest. Flat spots on many tool rests allow your fingers to slide back and forth. Some are adjustable and will fit most lathes. Other rests can be adjusted for different heights. Here are some features you should consider when buying a lathe tool rest:
Light source
It's not difficult to understand the concept of a lamp source that powers a tool rest on your lathe. Many lathes are equipped with overhead room lighting, as well as fixtures that are attached to the ceiling or headstock. These lights provide additional lighting, but can get in the way of operator access. For larger lathes, a tool rest with an integrated light source is the best option.
A lathe tool rest includes a vertical and horizontal post. The tool arm has a light source on its front, which is usually an LED illumination strip. An electrical power source is connected to the strip via a wire 20. Alternatively, a tool rest without a light source is provided. This invention allows for the creation a tool rest that is more ergonomic and includes a light source.
Support element
Support element to tool rest for lathe solves many problems related unexpected movement of toolrest. The support for the toolrest as described in the prior art was provided by a point/to-point butting arrangement. Because the toolrest is required to bear torque, axial force and tooling during the process of tooling, the friction generated is not sufficient to support the toolrest. This design poses safety issues. The toolrest can be supported by the Support element for the tool rest for lathe against torque and axial forces generated during tooling.
A toolrest is a piece of metal that stands on its own. The bar is used to provide restraint. It may also have grooves for positioning the tool. Some models have a handle to guide the tool while turning. These toolrests are made of either metal or wooden. All wooden toolrests must be smoothed. If you don't have the budget for a support component for your tool rest for lathe, you can still choose a wooden one.
Adaptive device

The adaptive device 100 is an externally cylindrical sleeve with a head and threaded section. There's also a threaded portion on the outer edge that connects to an opening 150. A flat surface 160 is formed by the milled shoulder 140 to accept set screws in the latheholder 310. The set screws370 press against flat surface 160 to keep the adaptive device positioned within the lathe.
Although the Mortimer pin rest claims to have a gated function but the support bar rides almost parallel to the tool shaft so it should be able provide enough levering power sideways. This device has a very large gate, which almost certainly suffers cam locking. Although it is an improvement over standard tool rests, this device offers very few benefits in terms motion restriction and tool control. It is not recommended for users who require precise tool control but want to have complete tool control.
Use a cutting tool
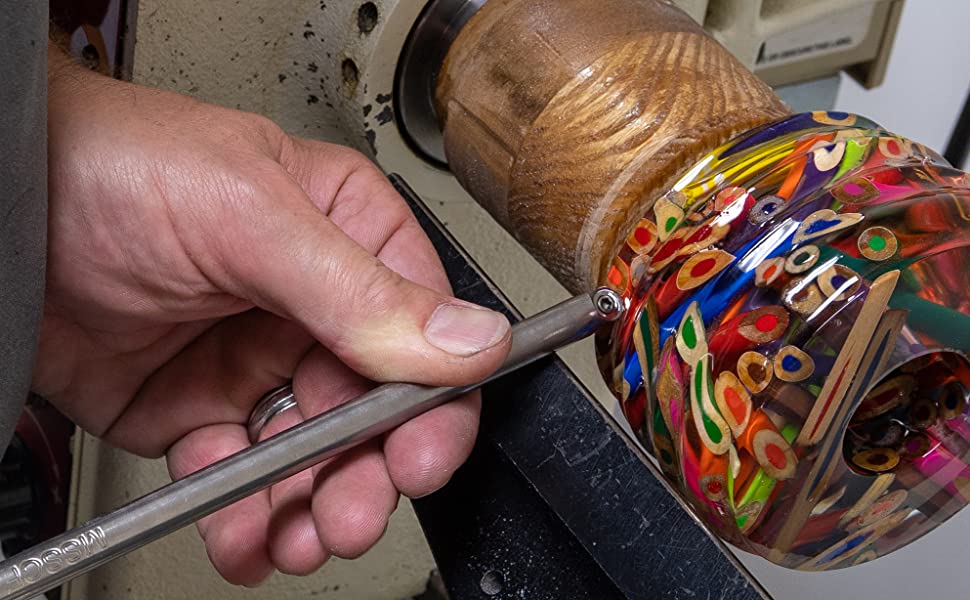
If you are new to lathe work, the first thing you'll want to consider is purchasing a cutting tool rest for your lathe. This accessory will allow to keep your tool as close as possible to the wooden surface while it rotates. The body of a toolrest slopes backward from its forward edge. This helps to position your tool at the optimal angle to cut. You can smoothen the surface of your cutting tool rest by using a file.
Flat spots are best for cutting tools rests for lathes. Your fingers won't rub against the flat surfaces. This type is great for handwork because it prevents your fingers from slipping off of the cutting tool. It also keeps the workpiece stable when turning it at high speeds. There are many sizes that will fit your lathe. A professional can help you choose the right size for your lathe.
FAQ
Where to Buy Hardwood Lumber?
Home Depot can sell hardwood lumber. They carry a variety of wood products such as flooring, cabinets, and furniture.
There is also a wide selection of engineered hardwoods, including Ipe (Araucaria Angustifolia), Brazilian Cherry(Pau d'Arco), Mahogany (Swietenia Mcrophylla).
These woods are available online by searching Google for "hardwood lumber".
What type of tools does a carpenter use?
A hammer is probably the most widely used tool for carpenters. A hammer helps to carpenter pound nails into the wood. This helps to keep pieces together when they are working on a project. Other tools include clamps.
What tools should you start with to become a woodworker
Woodworking requires patience and practice. It takes time for you to master the different techniques and tools that are required to woodwork.
There are many different types of woodworking equipment available on the market today. Some prefer to use power tools and others prefer hand tools.
The choice is yours, but you must ensure you choose the right tool for the job. If you don't have any experience, you may consider starting with a basic set of hand tools.
You might also want to learn how a router works, which allows you to cut wood into intricate shapes. You can find these at most hardware stores.
How much will it cost to get started?
Each project is unique so there aren’t exact numbers. But if you want to get an idea of how much money you'll need, consider these factors:
-
Material cost
-
Tools and equipment
-
Time spent working on this project
-
Your hourly rate
-
What amount of profit can you expect to make?
-
It doesn't matter if your goal is to hire help
For those just beginning, it may be a good idea to start small with simple items like boxes and picture frames. You will gain more experience and be able to tackle larger projects.
Where can I start woodworking?
It is best to actually build furniture to learn how to make it. While you will need tools and make mistakes, you will eventually master the art of building furniture.
Choose a project that interests you. You can make a simple box or a large entertainment center. Once you've decided on a project, find a local woodworker who specializes in that kind of work. Ask him or her for advice on what tools you'll need and where to find them. Maybe you can ask the person if they know of anyone who does this sort of work.
Do you have any suggestions for starting a woodworking shop?
It is hard work to start a woodworking company. But if you're passionate about your hobby, you won't mind putting in the effort. Plus, you'll probably enjoy the challenge of running your own business.
You should remember that unexpected issues may occur when you launch a new venture. For instance, you might run out of money unexpectedly. Or maybe you'll find that customers aren't willing to pay as much as you'd hoped. You must be ready to deal with such situations in order to survive.
A good tip is to open a separate bank account for your business. You'll be able to track how much money comes in and out.
Statistics
- Overall employment of woodworkers is projected to grow 8 percent from 2020 to 2030, about as fast as the average for all occupations. (bls.gov)
- Woodworkers on the lower end of that spectrum, the bottom 10% to be exact, make roughly $24,000 a year, while the top 10% makes $108,000. (zippia.com)
- In 2014, there were just over 237,000 jobs for all woodworkers, with other wood product manufacturing employing 23 percent; wood kitchen cabinets and countertop manufacturing employing 21 percent. (theartcareerproject.com)
- The best-paid 10 percent make $76,000, while the lowest-paid 10 percent make $34,000. (zippia.com)
External Links
How To
Tips on how to drive a nail in wood
It is essential to pick the right size and style of hammer before you can drive a nail in wood. The most popular types of hammers include claw hammers as well as mallets and ball peenhammers. Each type of hammer has its pros and cons. A claw hammer works well when you're trying to hit nails with a heavy hammer. However it is difficult to precisely control where the blow hits. Although a sledgehammer can be used to hit large areas quickly, it is too heavy to be useful for small tasks.
After choosing the right hammer, place your hand flat against the side of the head so that the handle rests comfortably in your palm. Take the handle and hold it with both hands. But don't press down so hard you injure yourself. You should hold the hammer straight-up, with your wrist still relaxed. Swing the hammer back towards the ground, with your aim at the middle of the nail. You should feel the impact from the hammer striking a nail. If you're having trouble getting the hang of swinging a hammer, practice with a block of wood until you get the rhythm down.
The hammer should be held close to your body when you are ready to begin driving the nail. To ensure that the nail is perpendicular on the surface of the wooden floor, position it. Keep your focus on the tip of each nail. Swing the hammer forward, then follow through with the motion of the hammerhead. This can be repeated several times to increase the speed of your swing. Once you have mastered this technique, increase the power of your swings. To make it more powerful, hold the hammer up high to your shoulder and then bring it down. This will allow you to exert more energy.
After you have nailed the hole, take the hammer off the nail. To pull out the remaining nails, use a screwdriver or pry bar. You should ensure that the nails are flush with the board's surface to avoid splitting the wood.