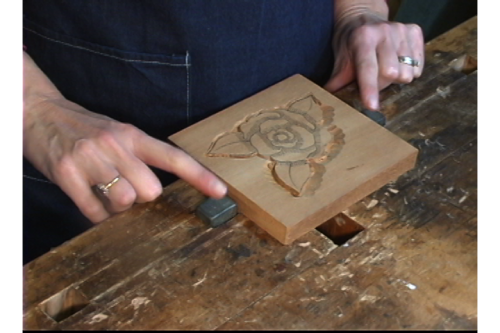
Select a piece of wood to begin carving a face out of wood. Make the necessary cuts. As the expert guides, you can watch a video that shows the entire process step-by-step. You will be able to carve the face more realistically by using the progressive cut. To create a realistic face, the progression of the noses is key. You can add realistic details to your face by using colored dyes or shellac.
Hardwoods
Before carving a face out of wood, it is important to consider what type of wood you will be using. Hardwoods are a class of trees with broad leaves that grow in a variety of climate zones. Because of their wide range of density, strength, and appearance, hardwoods are suited for various purposes, including building and furniture. While hardwoods may be more affordable than softwoods due to their durability and fire resistance, they are still very durable.
If you are new to wood carving you might consider softwood such as butternut and basswood. These types of wood are more easy to work and are an excellent choice for beginners. You should keep in mind that soft woods will not have the same quality or finish as hardwoods. You should experiment with different types before you settle on a single type.
Softwoods
First, choose the type of softwood you want to use when carving a wood face. Softwoods tend to be more difficult to carve and will often have many knots. They are also more susceptible to breaking, particularly if you use large strokes. The smallest pieces of wood will be cut by a beginner carver, which reduces the amount of detail. While this isn't a major issue, it is something to be aware of.
Some hardwoods are easier than others. Aspen, butternut, and basswood are among the easiest to work with. For this reason, it is best to use knives with a steeper bevel. Softwoods are easier than hardwoods to work with, and can be carved along the grain or across it. The quality of the finished product will depend upon the wood you use to carve it.
Colored Dyes
Colored dyes can be used to give wood carvings a vivid, detailed look. These dyes are available in a variety colors that can be mixed with water or alcohol to create unique colours. Use colored dyes that are mixed with shellac to lighten woods. Be sure to ventilate your workspace and use denatured alcohol to clean brushes after applying the dyes. Another option is paste wax. Excessive glossiness can distract you from your work. To remove any excess glossiness, use 0000 steel wool.
You can easily apply wood dyes in many different types. Wood dyes are compatible with all topcoats and are easy to apply. They can solve common finishing problems. They come in a variety primary colors so they are easy to mix up and apply. They're also available in a variety of shades and can be mixed according to individual preference. They can also be combined to create unique colors.
Shellac
Shellac should be available before you apply it to your wood carvings. You can purchase a jar of shellac, but the easiest way to apply it is to use a brush. A two-pound cut is sufficient. This is because the shellac will gradually build up and will reduce brush marks. Because shellac is very thin, it is best to purchase a thicker than a thinner cut. To ensure that you get enough, make your own pad using golf ball-sized chunks of cotton. Then, dip the tip of your brush into the shellac and let the excess flow back into the bottle.
Shellac can be used for accenting grain or adding color. Shellac can be mixed with different colors to create custom blends. You can also darken the shade using extra coats. Unlike some other wood finishes, shellac won't yellow or become cloudy over time. Shellac is also more durable, which means you can make even more faces. And you can do this with any kind of wood carving project!
Gouges
You can find a wide variety of sizes and shapes in gouges. The most common gouges are the palm and straight. Palm gouges can be held in one hand, while straight gouges require a larger handle and shaft. Hand held carving is easier with the shorter handles. The palm gouges, also known as veiners, are great for carving wood faces. Before you start carving, there are some things that you need to know.
First, learn how to choose the best gouge. The gouge you choose must be capable of creating a shallow, v-shaped groove. Make sure you buy a tool with a sharp edge and a small sweep. Gouges can be categorized by their size. A 3/10 inch gouge will cut the same amount as a 5/10 inch gouge. As the first number increases, the scoop between the edges becomes deeper and the sweep gets progressively more curved. A gouge with a small sweep will be able to carve a shallow v-shaped profile.
FAQ
Where to Buy Hardwood Lumber?
Home Depot can sell hardwood lumber. They carry a variety of wood products such as flooring, cabinets, and furniture.
A large variety of engineered hardwoods is available to them, including Ipe (Araucaria Angustifolia), Brazilian Cherry and Peau d'Arco.
These woods are available online by searching Google for "hardwood lumber".
What type of tools does a carpenter use?
A hammer is probably the most widely used tool for carpenters. The hammer is used to pound nails into wood. It also helps them hold pieces together while they are working on a project. Other tools include clamps.
How can you calculate the woodworking price?
Remember to keep costs as low as you can when calculating project costs. Make sure you're getting the best prices on materials. It is also important to consider the costs of other factors, such time, skill, and experience. To get an idea about the average cost for common household DIY tasks, see our guide to the average woodwork project price.
What wooden items do you sell well?
The best-selling wooden items are those which have been made from wood that was harvested sustainably.
Maple, cherry, mahogany walnut, teak, mahogany and maple are the most common woods for furniture.
These woods are extremely strong but also have beautiful colors and grain patterns. They can also last for years if they are properly cared for.
To prevent moisture damage, wood furniture should always first be painted. This covers all surfaces, drawers included, as well as doors and handles.
If you want to make sure that your furniture lasts as long as possible, then you should choose a paint that is resistant to water.
Followed by two coats, you should apply a quality oil-based primer. It is possible to apply multiple coats depending on how heavy the wear.
Spray cans and aerosol spray paints are not recommended. These products contain solvents that evaporate quickly and leave behind harmful fumes.
Can I make my living doing this job?
Yes! In fact, many woodworkers already do. According to U.S. Bureau of Labor Statistics (BLS), woodworkers earned a median annual salary of $34,000 in May 2012. That's higher than the national average of $31,000 per year.
What is the difference in plywood and particleboard?
Plywood is made up of layers of wood pressed together under pressure. Plywood comes with a range of thicknesses, and it is most commonly used for flooring and cabinets. Particle board is made from sawdust mixed with resin and then compressed into large blocks. This board is commonly used in home improvement projects. Both boards can be cut easily and are both durable.
Is there a way to start my own woodworking company?
It's not easy to start your own woodworking business. There are many regulations and legal requirements that you will need to comply with. But, this doesn't mean you need to go through all of the trouble of setting up your business. Many people choose to join existing businesses. This allows you to join existing businesses and pay only membership fees.
Statistics
- Most woodworkers agree that lumber moisture needs to be under 10% for building furniture. (woodandshop.com)
- The best-paid 10 percent make $76,000, while the lowest-paid 10 percent make $34,000. (zippia.com)
- Overall employment of woodworkers is projected to grow 8 percent from 2020 to 2030, about as fast as the average for all occupations. (bls.gov)
- In 2014, there were just over 237,000 jobs for all woodworkers, with other wood product manufacturing employing 23 percent; wood kitchen cabinets and countertop manufacturing employing 21 percent. (theartcareerproject.com)
External Links
How To
How to make wood joints
This tutorial will help you join two pieces of wooden together. We will use the pocket hole joint, which is drilling holes in the wood to join them. If your wood has a straight grain, smooth surface, you can use this method. You might consider dowel joinery if your wood isn’t straight or flat. Here are the steps
-
Drill Pocket Hole Joints. First, measure the area where you wish to place the pocket joint. With a handheld drill machine or jig saw, drill 3/4-inch deep holes in the ends of each piece.
-
Sand Smooth. Sanding the wood's edges will ensure that the joint doesn't split.
-
Glue together. Apply glue to the sides of both wood. Allow it to sit for approximately 5 minutes before you clamp the pieces together.
-
Secure the pieces together. After the glue has dried properly, clamp the pieces together to make sure they are flush.
-
Trim Joinery. Trimming the joinery after glue has completely dried.
Be sure to leave enough space between each piece so that they can be turned inside-out.